Rock monster homework. I tried to stay with a more... sandstoneish colouring, something you would find in quarries and such. I wanted to try a more spikey monster too, rather than the lumbering bulk of most 'rock' monsters. The head was slightly inspired by the pokemon Cubone... but I made it much more menacing. The arms and body is also assymetrical, as no two rocks in nature are ever usually the same.
I think some of the shading could have been better.... and a bit more detailing around on the head and eyes... but it does work ok...
Tuesday, 26 February 2013
This was a volcano monster that we had to paint. I painted a basigc shape under the sketch, in a reddish colouring, to represent the dark areas of the magma. I then put the black rock over on a layer above, cutting it away and creating the cracks. I also gave it a bit of texturing too to help give it some more shape. I then slowly brought up the lava brightness till it was almost white., adding glow and such around the lit areas.
I also thought it would be interesting to send the contrast to max, and it turned our rather cartoony.
Character portrait with the Daarken brushset that Steve gave us. In terms of the face I was really happy with, However I am not happy with her right arm and shoulder...
Tuesday, 12 February 2013
The two weekly sketches. This time was the gundam (observation from a model on my desk) and one of my commission pieces.
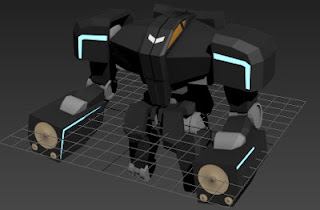
For our homework for a 3D paintover for a robot, I wanted to try a mecha, specifically one of my designs from a small while ago. I decided after looking through a few of my old designs, I finally settle on this:
I also was going to use this design for another project, yet thought it would be a nice challenge in terms of the modelling especially.
I decided to make this able to be rigged, and rendered easy too. I decided to make it in chunks; torso, hips, shoulders, upper arms, lower arms, upper legs, lower legs and feet. I made it one half at a time, occasionally flicking to a mirrored image to check it was ok.
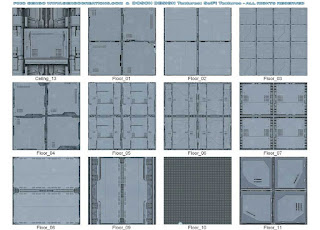
The final render was a bit of a pain to texture, as the textures I used didnt really show up much...
Tuesday, 5 February 2013
What is effectively a Zombie rattata. I COME FOR YOUR POKEBRAINS.
Not a fan of this painting technique...
Not a fan of this painting technique...
For this homework we were to do a paintover of a 3D model of a gun turret or sci-fi weapon. I first started thinking of the massive weapon Bessie in the TV show Motorcity, and the Hyperion Sniper Rifles in Borderlands 2 along with the Halo 3 machine gun turret.
These designs gave me an idea for a small fortification or vehicle mounted turret. I wanted to keep the triangular barrel shape from the Halo turret, as it is very distinctive. But I wanted a bit of the bulk of Bessie. After a few minutes I came up with this design:
I then took it into 3DS Max and began modelling.
There was a bit of fiddling when I started to make the triangle barrel, finally settling on a hexagonal faced cylinder, and tweaking. Most of this was created through more trial and error, copy pasting and moving objects about. I also had trouble with the lighting, only rectifying it after around 3 hours of fustrating fiddling..
The 3D paintover was a bit more simple, I started with giving it a backdrop and shadow before using the skew tool to place these textures over with overlay layers.
I also added some wiring and used burn and dodge to make it a shinier and more metallic piece of equipment, ending up in the final paintover.
I think more of the design could have been a bit more functional really.. and a bit more skill in the texturing would have been nice!
Subscribe to:
Comments (Atom)


.jpg)


